Wednesday 8 May 2013

Late Update

I have done a few things since i last updated my blog such as: Unwrapping a 'complex object' as well as a basic object, Using the UVW Modifier, using the material editor to create different maps, such as maps with bump, as well as learning how to tile these map and using multi-sub object, as well as basic maps with things like Dent, Falloff or just adding my own basic texture, and lastly we have learnt about different lighting within the scene and how to use them effectively.

Teapot
For the lighting i just used a Teapot and added different lighting into the scene to show how they are used and what effect they give. Below are pictures of these.


Mapping
Using the material editor we learned about the Bump map and how it's used to add detail that looks 3D using our own created bump map, below is a sphere with a map i created using different maps and textures playing around with them, i first found a water texture on the internet and had to edit it within photoshop to make it so that it tiled and repeated easily without error, after this i applied it to the materials diffuse as a bitmap then added a bump and just used the wave material to make it look a bit more detailed and more like water then finally added a reflection map as a raytrace material to make it glimmer slightly and below is the outcome of the render.
Tiled water texture I used.


Dice/ Multi-sub Object
We also learned of multi-sub object, to demonstrate this i created a basic box and added a different texture to each side to make it look like a dice, and played around with the ID's of the different bitmaps within it so the right numbers were opposite each other such as 5 being on the opposite side of the dice to 2. below is a render of the dice. I tried adding a chamfer to the edges of the box to make it look less sharp but this made the map apply to the chamfered edges as well as on the correct sides themselves, this is easily fixed by changed the ID's of the polygons created by the chamfer to that of the plain materials within the multi-sub object, although i did not do this because it was not really necessary for a basic object.

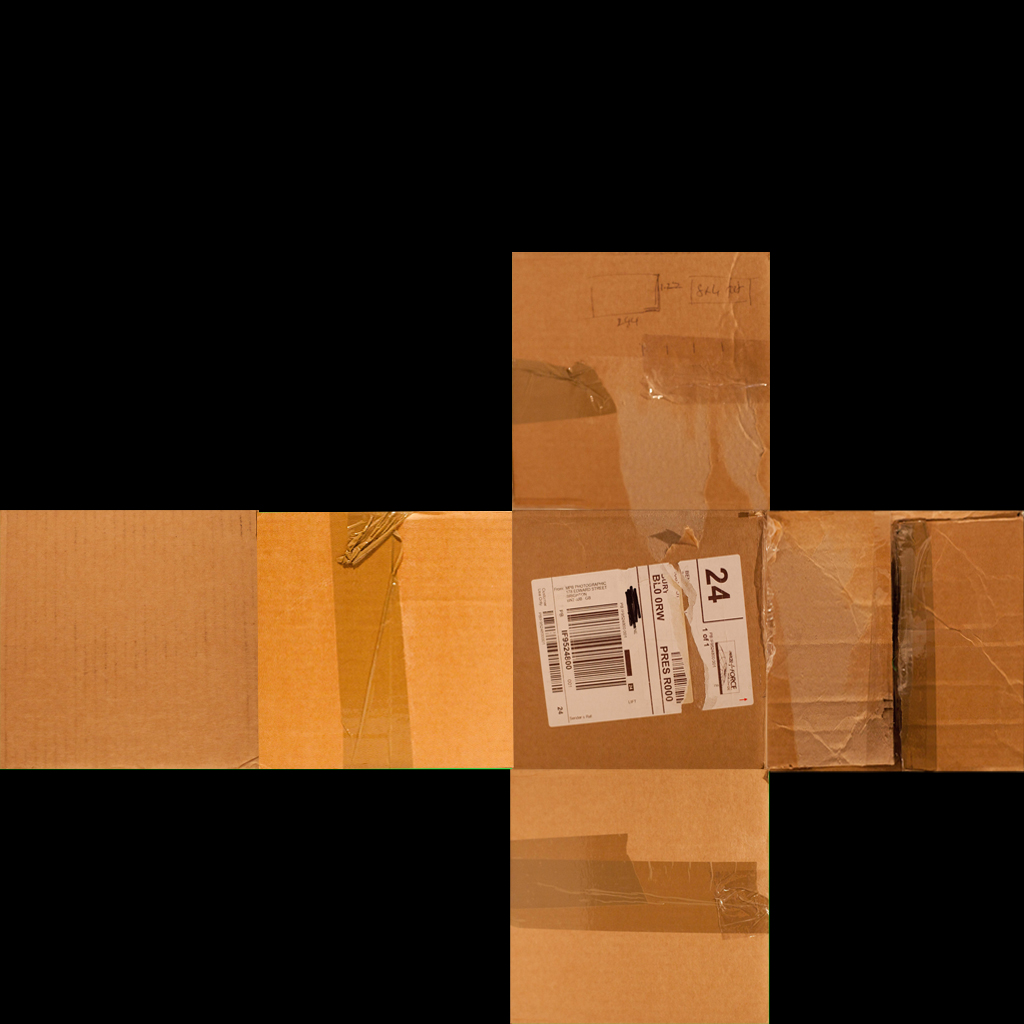
UVW, Complex & Basic
Lastly i learned about UVW Mapping, and applied this to 2 different objects, a simple box shape and a more complex house object with a chimney. Mapping the box was fairly simple as the UV Template was a simple unfolded box but the house however was more complicated as i had to play around with the UVW and re-size the different size to make them all the right ratios to each-other so the texture came out clean and so it was easy to apply within Photoshop, the outcome as well as the templates and the textures applied to the templates for the box and the house are below.

Wednesday 6 March 2013


3D Update 06/03/13

Today i finished 2 of my objects, i changed what i was
going to do and ended up creating a bow and an arrow
 using different techniques ive learned over the past few
 weeks, below is a render of my 5 objects in 1 scene.


Wednesday 27 February 2013


3DS Objects Update

Currently i have finished 3 Of my objects and i am in the process
of creating my 4th, i learned about the modifier tool 'FFD' which helped
 alot when it came to making my battleaxe, bending the blade was alot easier,
 it would have made making my katana quite a bit easier if i had known 
about this modifier previously, Some of the techniques ive used making 
my Mace and Battleaxe are things such as loft being the main one, used 
to create the handle, the scale tool was used and i used the compound 
object: Scatter, to create the mace head itself. Below are pictures of
my objects so far.


Wednesday 13 February 2013


Half Way Point

We're currently half way through our project in which we
 have to create 6 different objects and i haven't made much 
progress, i'm still creating my first object the Katana and have
 been having some issues making the blade and issues with the Boolean
tool, i sorted the Boolean out and finished the hand-guard but im having
 the blade issues at the moment which will hopefully be resolved soon.
I hope to finish my first object today and do some
 work at home to create some of the others and
 get the project finished for the deadline.

Wednesday 6 February 2013


3D Modelling Proposal


The Brief
For this project I have been asked to create 6 different objects based off a theme I choose, the deadline is the 27th so I have 3 Sessions, 4 weeks to do my objects and overall there isn’t much of a constraint on the time we get to make it as we can do as much as we like in our free time as well as college time.
My response to the brief
     For the project I’m going to be creating 6 different weapons.
Skills and Styles
     To create the objects I am going to be using several different skills and techniques we have learned over the past few weeks, those being different types of modeling within 3DS Max such as Box modeling, spline, loft etc. I will try to use as many different methods to create my objects as possible.
Resources & Assets
     To make my objects I will be using the Program 3DS max and using the internet to get inspiration and ideas.
Legal Restrictions
     I can’t claim somebody else’s work as my own.
How I will measure success
     If my object looks like the item I was trying to create or close to it then I would consider my project to be a success.

Wednesday 30 January 2013


Chamfer/Smooth
 
Using edit poly on a cylinder we created a
tap and then smoothed it using the meshsmooth
modifier, doing this created a messy tap with huge
curves, not very eye catching, to fix it we chamfered
the corners we wanted to have small curves just
slightly, this locks the distance it smooths making it
cleaner and smoother.using chamfer is a great way
to control theway mesh smooth smooths the object
.After this we also learned how to control the smooth
more by using groups, so they dont smooth together
in 1 blob, on the right is a picture of whats 
meant to be a game joystick, created using
 the group smoothing.


Soft Selection/Displace
 
Displace
Today we learned about Displace and Soft Selection,
 displace is great for creating landscapes really quickly, to
 do so you have to create a jpeg file in black and white, the white
on the picture would be where the land rises and the black
being the lower land, and the greys in between being
different levels of height darker being lower
 and lighter being higher.
 
 
Soft Selection
 
After displace we started using Soft Selection within the
edit poly menu, this is great for editting objects making bubbles
 and such, i created an aeroplane after this and you can see where
ive used soft selection on the main tube creating
 the cockpit and the back of the plane and on the
engines underneath the wings.